With a newly installed Windows PC, only a few system services and programs start. The resource requirements are correspondingly low and the operating system responds quickly.
This changes over time, which is mainly due to the additional software installed. Programs and services that start automatically after Windows logon lead to delays. The startup time of the system increases and it takes longer and longer for the desktop to respond to mouse clicks or for a program to start.
How noticeable the system slowdowns are depends on the overall performance of the computer and the performance of the hard drive or SSD.
As a general rule, a program that is only installed but does not start automatically cannot slow down Windows. However, this only applies if there is enough space available for temporary files or downloading updates, for example.
To avoid mistakes, you should therefore never fill drives close to their capacity limit. With both hard drives and SSDs, too little free space also affects speed for other reasons (see box “Making the most of hard drives and SSDs”).
Further reading: Make Windows 11 better: How to customize and expand the Start menu
As in real life, tidying up is also a regular task in Windows. Removing superfluous files ensures that there is always enough free space on the drive. You should also remove unused programs, move particularly large files from the SSD to an existing hard drive and deactivate autostart if it is not required.
The Windows on-board tools can provide valuable services here, while additional tools offer more and advanced functions.
However, there is no simple one-click solution. Ultimately, the tools can only collect what you can possibly delete. After that, the responsibility lies with you. In this article, we provide decision-making aids and show you where you should be careful and what you should not delete.
Note: The tips in this article apply to Windows 11, but some of the functions are also available in Windows 10.
1. Check memory utilization
Call up Settings — for example, with the key combination Win+I or a search in the Start menu. Go to System > Memory. You will see an informative overview with the total utilization of the system drive as well as the storage space used by temporary files and installed apps.
Under Other, Windows displays the space occupied by files that cannot be specified in more detail. Clicking on Show more categories takes you to a list of other areas, such as Documents, Pictures and Videos. You can see how much storage space is occupied in each case.
Clicking on one of the categories shows detailed information:
- Other shows some of the largest folders on the drive. You can open the folders by clicking on them in Windows Explorer and then decide whether something can be deleted.
- Installed apps leads to Apps > Installed apps. The view can be sorted by size or installation date. You can use the three-dot menu to uninstall programs that you no longer need.
- Temporary files shows a list of areas in which files that may no longer be required are stored. After a Windows upgrade, Previous Windows installation(s) appears in the list. This is the folder C:\Windows.old. You can remove this if everything is running smoothly and you no longer want to return to the previous Windows installation. Windows automatically deletes the folder after about a month.
Under System > Storage > Temporary files there is a tick in front of all entries that you can delete without hesitation. To do this, click on Remove files. You can also tick the boxes in front of Downloads and Recycle bin.
But be careful: Downloads relates to your personal download folder. If you do not want to lose the downloaded files, do not tick this box. For Recycle Bin, you should make sure that there are no unintentionally deleted files in the recycle bin. Open the recycle bin by double-clicking on the desktop icon and check the contents.
Only delete if necessary: You can delete everything under Temporary files, but this is not useful in every case. The “thumbnails,” for example, are preview images that Windows saves in db files in the folder C:\Users[username]\AppData\Local\Microsoft\Windows\Explorer.
This allows Windows Explorer to load the preview images more quickly. After some time, the db files also contain preview images whose originals have long since been deleted. Regular cleaning therefore seems advisable.
On the other hand, the files do not usually take up much memory space and if you delete everything, Windows Explorer has to rebuild the cache of the preview images. Although this does not take long, it is unnecessary.
Further reading: 9 tweaks that turn off your Windows PC’s most annoying ads
The situation is similar with temporary internet files. Microsoft’s Edge web browser saves the elements of web pages in a cache, allowing it to display them more quickly. If the temporary internet files are deleted, it will take longer to load pages on regularly visited websites.
As a rule, the Edge cache does not occupy more than 1GB, which means that not much storage space can be freed up. Other web browsers use their own cache, which can be emptied in the respective programs (see point 7).
Storage overview: In the Settings under System > Storage you can find out how the hard drive is used. Click on the categories for further details.
Foundry
2. Windows 11 cleanup functions
In Windows 11, go to System > Storage in Settings and click on Cleanup recommendations. You will see the storage space occupied by downloads and the recycle bin as well as Previous Windows installation(s), if still available.
Tick the areas in which you want to delete files and click on the [X] GB cleanup button. However, this will not only delete the selected files, but also other temporary files. Click on Advanced options to find out about the effects.
The settings correspond to those under System > Storage > Temporary files, but the current selection is added, for example Recycle bin. If you consider it necessary, you can remove the tick from some areas before cleaning.
The list you get after clicking on Large or unused files is more interesting. You will see particularly large files and files used a long time ago that you may be able to delete. The list under Unused apps can also be helpful. However, only programs that you have installed via the Microsoft Store are displayed.
An alternative for Windows 10 and 11 is Iobit Uninstaller.
Under Programs, go to Rarely used to display the applications that are rarely used. The list can serve as a guide, but is usually not complete and sometimes shows inaccurate dates. However, it is not possible to do better than this because Windows does not reliably log the start time of a program.
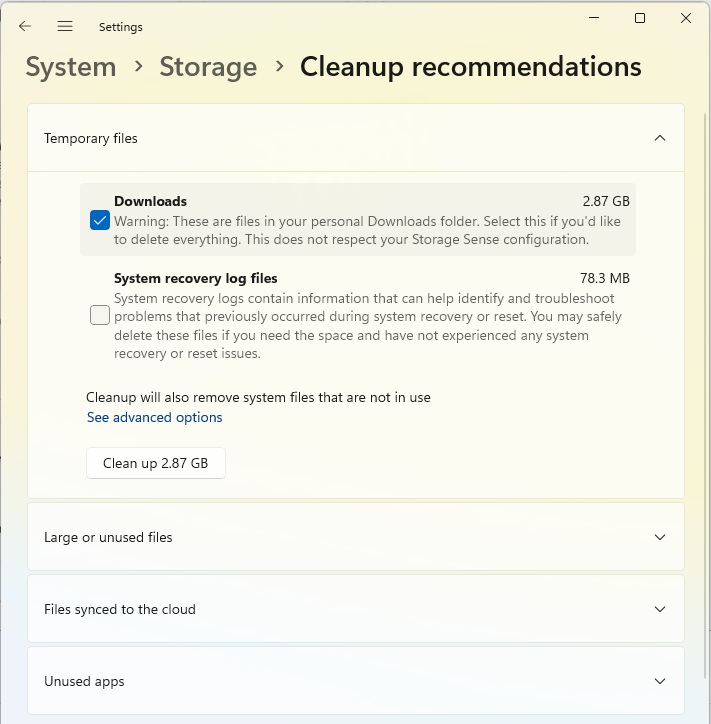
What can be deleted? The “cleanup recommendations” point to obvious areas such as the recycle bin. However, you can also have large files and unused apps listed.
Foundry
3. Free up storage space
If you don’t want to do all the tidying up yourself, you can leave the task to Windows. In the Settings, go to System > Storage and set the switch behind Storage Sense to On.
The service can be configured by clicking on Storage Sense. A tick is already placed in front of Keep Windows running smoothly by automatically cleaning up temporary system and app files.
Automatic user content cleanup is also switched on, but is only activated when required due to the default setting During low free disk space (default). However, you can also set a schedule for the clean-up with Daily, Every week, or Every month.
An interval can be specified under Delete files from recycle bin if they have been there for over:. The default setting is 30 days. If you are worried that there may still be files in the recycle bin after 30 days that you would like to restore, it is better to set Never and empty the recycle bin manually.
The same applies to the setting for the download folder, where the default setting is Never. Only if you are sure that this folder will never contain files that you still need should you set it to 30 days or 60 days, for example.
Users of the Microsoft cloud storage Onedrive will find a useful setting under Locally available cloud content. With the default setting of 30 days, Onedrive automatically changes the status of the files in the synchronized folder to Available online if they have not been opened within this period.
This means that the files no longer take up any space on the drive. If you open one of these files afterwards, it will be available on the device again. Files that you have marked as Always keep on this device are not affected by this setting. If you do not want Onedrive to change the status of the files, set Never.
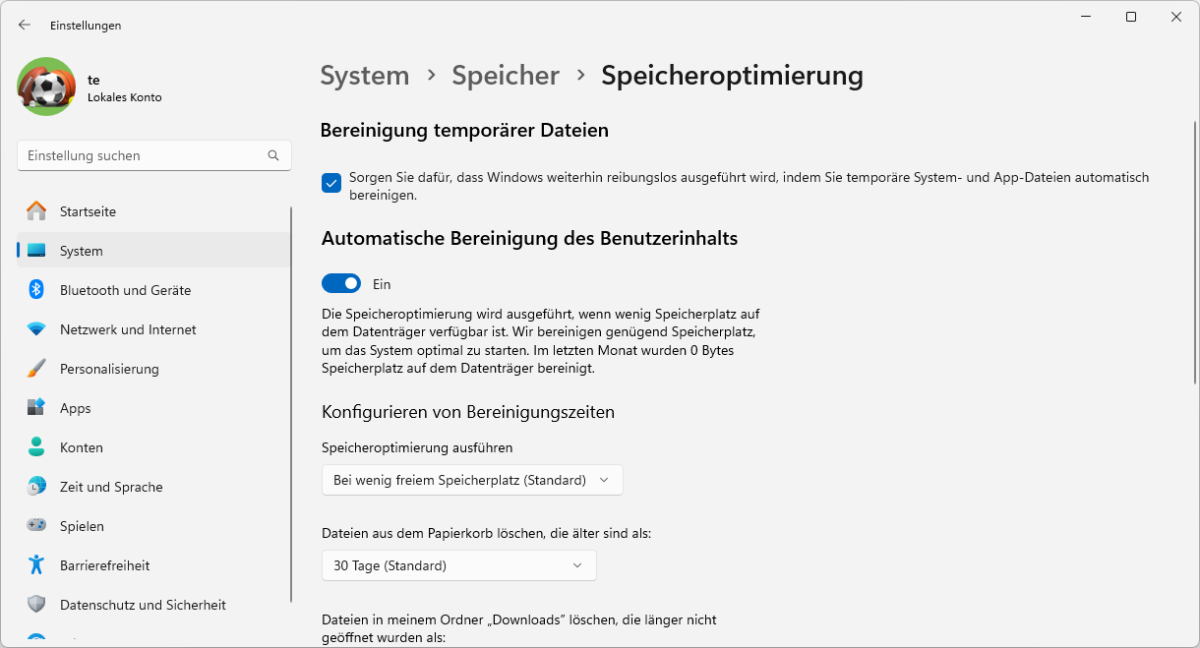
“Storage optimization” automatically creates more space on the system drive. You can specify what is deleted and when.
IDG
4. Relocate standard storage locations
If your PC has an additional SSD or hard drive, you can use this as alternative storage. An external USB drive is also suitable, but must be permanently connected depending on how it is used.
Further reading: The best SSDs
You can simply move personal files to the other drive using Windows Explorer. However, Windows also offers options to change the storage location of default folders.
In the Settings, go to System > Storage, click on Advanced storage settings and then on Where new content is saved.
As the name suggests, the settings only apply to new files. To save space on the system drive, you can specify the second drive under New apps will save to:, for example E:\. Click on Apply for the setting to take effect.
You can also select the second drive under New documents will save to:, whereby Windows creates the folder E:[user name]\Documents. If you now save a document in a word processor or the Windows Notepad editor, the new storage location is preset.
However, this procedure has a disadvantage: In Windows Explorer, Documents still leads to the previous folder on drive C:\. An overview of files from both locations is provided by the libraries, which Windows Explorer does not display by default.
To change this, go to Options in the three-dot menu and switch to the View tab. Under Navigation pane, tick the box next to Show libraries. If you then go to Libraries > Documents, you will see the files from both folders.
Moving personal folders completely: Because of the disadvantage mentioned above, it makes more sense to move folders such as Documents, Pictures, and Downloads completely to another drive.
First create the destination folder, for example E:[username]\Downloads. Right-click on the desired folder in Windows Explorer, go to Properties and then to the Path tab.
Click on Move and select the previously created folder. After clicking on OK, confirm with Yes that Windows should move the existing files to the new location. In Windows Explorer, under Start or in the navigation area, open the folders with the previous content but with the new storage location.
5. Change storage location for apps
A conventionally installed desktop program is located by default in the folder C:\Program Files or C:\Program Files (x86), which Windows Explorer displays as C:\Program.
If space becomes tight, programs cannot simply be moved to another drive, as the paths to components and settings in the Windows registry are then no longer correct. However, you can usually specify a user-defined destination on a different drive when reinstalling programs in the setup program.
This is particularly recommended for an SSD with little storage space and if a program requires a lot of storage space, for example a PC game. However, the loss of speed when starting from a slower hard drive must be accepted.
Apps from the Microsoft Store can also be moved to another drive without reinstalling them. In Settings, go to Apps > Installed apps and click on Move in the three-dot menu for the desired app.
Select the target drive and click on Move. If the menu item is not available, it is a desktop application. The pre-installed system apps cannot be moved, which is why the menu item is grayed out.
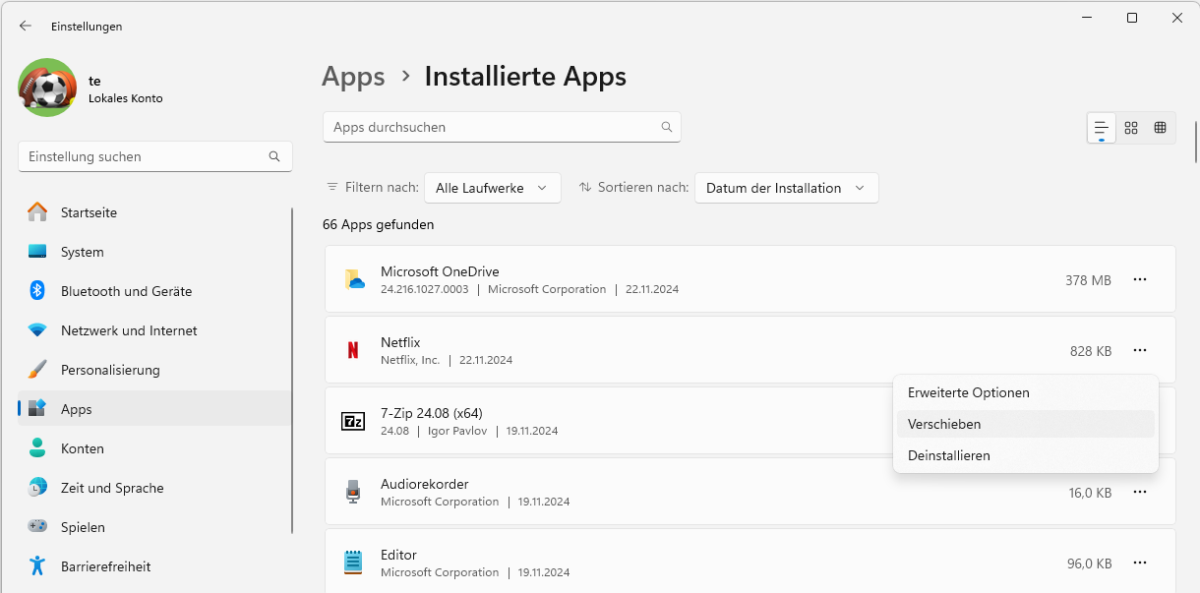
Apps from the Microsoft Store can be moved to another drive. This option is not available for pre-installed system apps.
IDG
Making optimum use of hard drives and SSDs
Due to its physical structure, a conventional magnetic hard drive delivers data at different speeds. The average transfer rate of a current hard disk can be 200MB per second, for example.
In the outer area of the magnetic disk, the read/write heads can capture more sectors in the same amount of time than in the inner area due to rotation and circumference. With a freshly installed Windows, the system files are located in the fast outer area; what is added later is located in the increasingly slower inner areas.
The hard disk can reduce this effect by using a cache. The data first ends up in the fast cache and only then on the hard drive. The transfer rate is gradually reduced by the limited size of the cache as you copy many small or a few large files to the hard drive.
In the course of using a hard drive, files are deleted and new ones are created. The drive’s controller uses the next free blocks to store the data.
If a file does not fit into the area of a contiguous block, the next one is used, which may be a long way away. The read/write heads then require longer paths, which reduces the transfer rate and increases access times.
The performance of the hard drive can be improved by defragmentation. The files are reorganized in blocks that are as contiguous as possible, which speeds up access. The “Optimize drives” defragmenter from the Windows accessories (Win R, dfrgui) does this automatically once a week by default.
The Windows defragmenter seems to do its job perfectly, as it regularly certifies that the drives have a fragmentation level of “0%.” This may even be more or less true for PCs in average use.
However, large files are often heavily fragmented, which increases as the hard drive fills up because the contiguous, free blocks become fewer and fewer. This particularly affects games and the usually very large virtual hard disks of virtualization software.
If this applies to you, first make sure there is enough free space on the hard drive. Only then can a defragmenter work optimally. A suitable program for this is Defraggler.
After starting, select the hard drive and click on “Check.” If the program shows severe fragmentation, click on “Defrag.” As the process takes a long time for large hard drives, you can also selectively process individual files.
Switch to the “File list” tab. Click on the “Fragments” column header to sort the list by heavily fragmented files. The selected file can be optimized via the context menu item “Selected defragmentation.”
Special features for SSDs: SSDs do not need to be defragmented because the memory accesses are direct and the position of the memory cells is irrelevant. This results in short access times, which means that Windows and programs start faster.
The transfer rate is approximately 2 to 4 times higher than with hard disks, which also has a positive effect on overall performance.
However, you should also regularly free up storage space on SSDs. If the drive is filled to the brim, the controller on the device does not have enough free cells to organize the memory. The service life of an SSD increases if memory cells are not rewritten too often and there are enough spare lines.
With an average-use PC, however, there is no need to worry about the internal functions of the SSD. The manufacturers reserve an area for over-provisioning as standard, to which the user has no access.
Depending on the model and total capacity, this reduces the actual usable memory by 7 to 10 percent. This ensures that even with a well-filled SSD there are still free cells available.
On SSDs for server use with many write accesses, a larger area is usually reserved for over-provisioning. Some manufacturers also offer tools with which the reserve memory can be increased, for example Samsung Magican. However, this is only useful for servers.
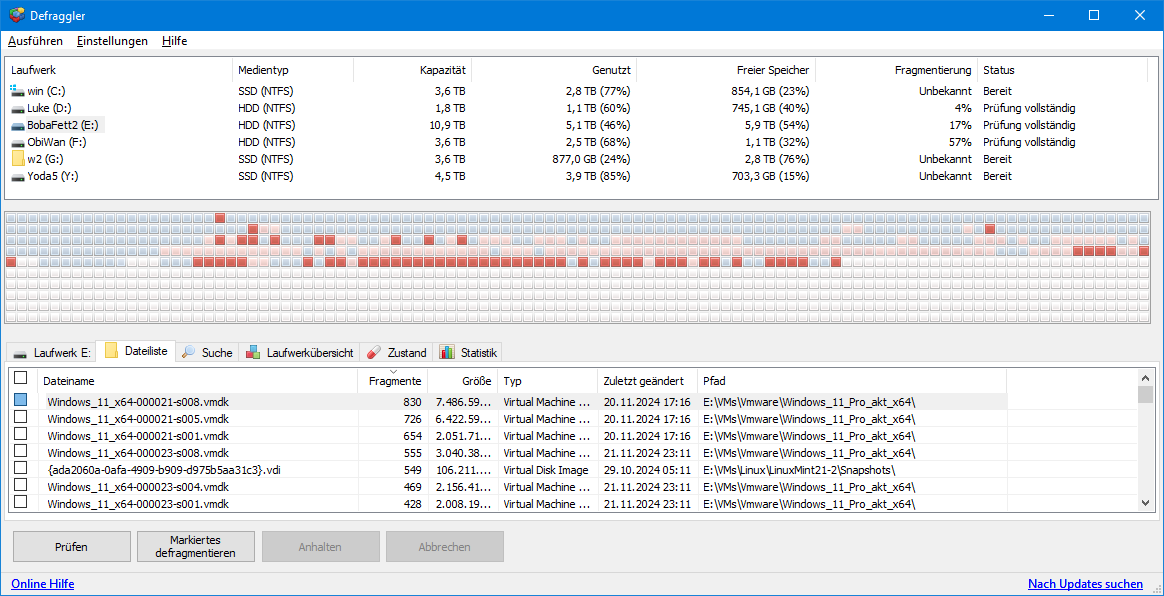
Defraggler attempts to move files into areas that are as contiguous as possible. The function can also be used specifically for individual, particularly large files.
IDG
6. Clean up discs
The disk clean-up function has been included with Windows 98, but the tool’s days are numbered. It is still included in Windows 11 24H2, but Microsoft already recommends using the functions in the Settings (see points 1 to 3).
However, if you wish, you can still use Disk Cleanup. However, this does not offer any particular advantage because the functions are now fully available in the settings under System > Storage.
If you still want to use Disk Cleanup, start the tool by searching in the Start menu or by pressing Win+R, entering cleanmgr and clicking on OK. If there are several hard drives, select the drive that you want to clean up, usually the system drive, C:. Click on OK to confirm.
After the analysis, tick the areas in which you want to delete something. For more information, click on a line and read the description. There is nothing you cannot delete without hesitation. However, the instructions for the recycle bin and temporary internet files from point 1 also apply here.
By default, Disk Cleanup only handles user files. If you click on the Clean up system files button and select the system drive, additional options are available to you. For example, Previous Windows installation(s) (if available), Log files for Windows upgrades, and Device driver packages.
On the More options tab, you can also click on Clean up under System restore and shadow copies. This deletes all restore points except for the last one, which can save several gigabytes.
Configure profile: If you want to use disk cleanup regularly for certain tasks, you can save the settings in a profile. If system files are also to be deleted, the configuration must be carried out with administrative rights, otherwise the rights of the standard user are sufficient.
With the saved settings, you can start Disk Cleanup without further configuration and delete everything at once.
Step 1: Use the Start menu to search for cmd. Right-click on Command Prompt and select Run as administrator.
Step 2: Type cleanmgr /sageset:1 and confirm with the Enter key. The number “1” is the serial number of the profile. You can enter any number up to four digits to save multiple profiles.
Step 3: Tick all the desired options. Click on OK to save the settings.
Step 4: Right-click on a free area on the desktop. Select New > Shortcut from the menu. In the input field, type
cleanmgr /sagerun:1and click on Next. Enter a meaningful name and confirm with Finish.
Step 5: Right-click on the shortcut, go to Properties and switch to the Shortcut tab. Click on Advanced and tick the box next to Run as administrator. Click OK and then click OK again.
If you now start Disk Cleanup by double-clicking on the shortcut, all configured tasks will be processed automatically.
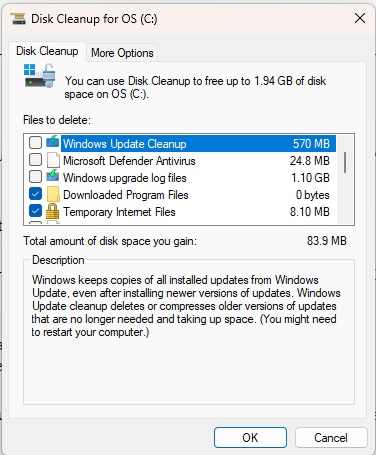
Disk Cleanup is considered outdated in Windows 11. However, it is still available in Windows 11 24H2 and can be used as usual.
Foundry
7. Delete browser data
One program that constantly generates data on the hard drive is the web browser. Browsers do not display websites, images, or videos directly, but first save the content, including images and JavaScript files, in the cache memory.
Depending on how a website is configured, data is preferably loaded quickly from the cache or updated via the internet connection.
As the cache improves the performance of the browser, it is not recommended to delete it. Browsers usually use memory space moderately and do not use more than necessary. However, you should delete the cache if there are errors in the page display, for example.
In Microsoft Edge, click on the three-dot menu at the top right and select Settings. Continue in the navigation area on the left-hand side and Privacy, search, and services.
Under Delete browser data, click on Choose what to clear. Under Time range, you can select a time period for which you want to delete elements. Under Cached images and data you can see how much memory the browser is using.
Remove the tick in front of the areas in which you do not want to delete anything. It is better to exclude Cookies and other site data. Cookies are required, for example, for navigation on websites and also for automatic login.
You should also be careful with Passwords and Autofill form data. If you have saved data via the browser, this will be lost if you tick the box here. After checking the settings, click on Clear now.
Other browsers offer similar options. Firefox users, for example, go to Privacy & Security in the Settings menu. Under Cookies and website data, click on Remove data. Remove the tick in front of Cookies and website data (recommended) and click on Clear to delete only the cache memory.
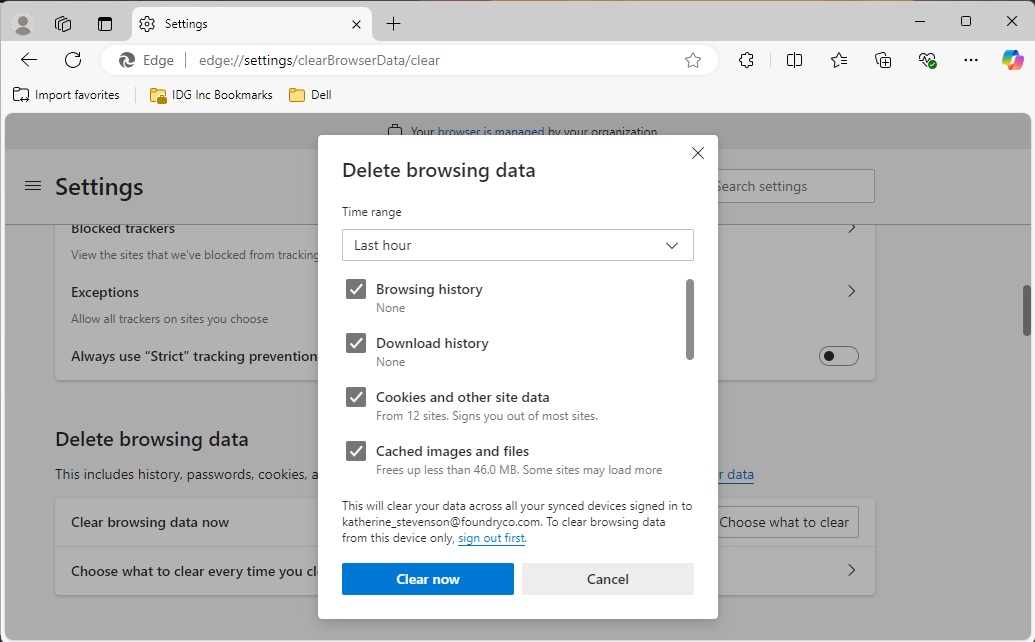
Browsers store numerous files on the hard drive, which makes websites load faster. However, in the event of errors or for data protection reasons, the files should be deleted.
Foundry
8. Optimize autostart
Many programs install services or nest themselves in the notification area next to the clock. This is practical for some applications — for example, if they regularly display important information or report available updates.
However, programs that you rarely use should be removed from the autostart. You can do this using Windows’ on-board tools via the Task Manager, which you can start most quickly by pressing the key combination Ctrl+Shift+Esc.
On the Autostart tab, programs can be removed from Autostart via the Deactivate context menu item. Nothing is deleted in the process. You can reactivate the programs at any time.
If you want to analyze all autostart ramps, use the Autoruns tool. You can deactivate services and autostart entries and reactivate them later.
The tool also offers an analysis via virustotal.com to determine whether malware is present.
If possible, you should uninstall programs that you do not use. This frees up space on your hard drive and improves security. However, the uninstall routines are often not thorough.
If you want to remove software with less residue, use tools such as Geek Uninstaller or Iobit Uninstaller.
The cleanup functions in Windows 11 already do a good job. However, additional tools allow a different view of the situation and work more thoroughly. Sometimes too thoroughly, however. Therefore, familiarize yourself sufficiently with the functions before you delete something irretrievably.
Bleachbit is one of the tools that can be used to delete a great deal. Close all applications, especially the web browser, before starting the tool. For each category, such as Firefox, Microsoft Office or System, there is a brief description of the options. Only tick the options if you are aware of the effects.
If in doubt, click on Preview first. Bleachbit will then show you which files are affected. Only after this check do you click on Final cleanup.
Another tool for the same purpose is Ccleaner. It is somewhat clearer than Bleachbit, but offers more settings and explanatory texts.
You can also use the Ccenhancer extension, whose rule sets you can set up via Download latest. This will significantly extend the scope of the main program’s program recording.
Ccleaner is by far the most popular software for cleaning up the operating system and installed applications.
Among other things, it offers tools for clearing out the autostart, analyzing hard drive contents, searching for duplicates, managing browser plugins, and securely overwriting free hard drive space in order to delete any file fragments.
Treesize Free and Windirstat help to analyze the drives. These tools detect large files that you may no longer need and want to delete. Everything is actually a particularly fast search tool, but can also be used to sort the file list by size and thus identify space wasters.
Tidying up the registry usually does nothing. Nevertheless, you can use a tool such as Wise Registry Cleaner to analyze the registry. If you change anything here, you should first create a backup copy, for example with the Registry Backup tool.
Files or folders cannot be deleted if the access rights are missing. Use PC-WELT MyRights to add a new context menu item to Windows Explorer, which appears after a right mouse click while holding down the Shift key. Click on Take ownership to obtain full access rights.
Winsxs: The supposedly huge folder
When examining your hard drive, you may come across the “Winsxs” folder in the Windows directory. In the properties, Windows Explorer often shows a size of several gigabytes.
It contains important program libraries that are used by many applications, as well as system and exe files in different versions. Some of the supposedly numerous files are hard links, i.e. special file links that refer to the corresponding files under “Windows System32,” for example.
The actual size is therefore sometimes several GB smaller.
Never delete files from the “Winsxs” folder yourself. Doing so can permanently damage the function of the system or applications. Windows regularly cleans up the folder automatically via the task scheduler and removes files that are no longer required.
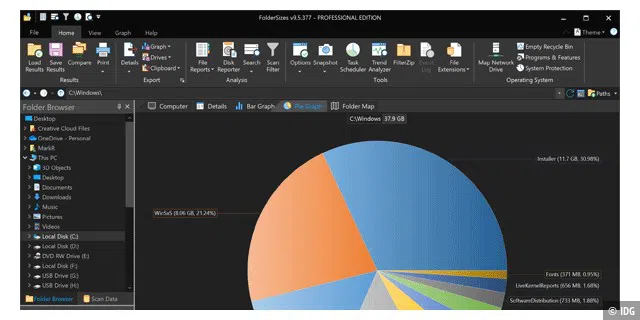
Foldersizes
Analyze partitions and search for large folders
When tidying up your hard drive, you often don’t know where to start. Foldersizes helps you by organizing folders by size and displaying this list as a pie chart, bar chart, or map. You can search for space-wasters down to file level with a click of the mouse.
In contrast to Windirstat, for example, Foldersizes offers a wider range of functions. The disadvantages: The tool is only available in English and must be licensed for 30 US dollars after a trial period of 15 days.
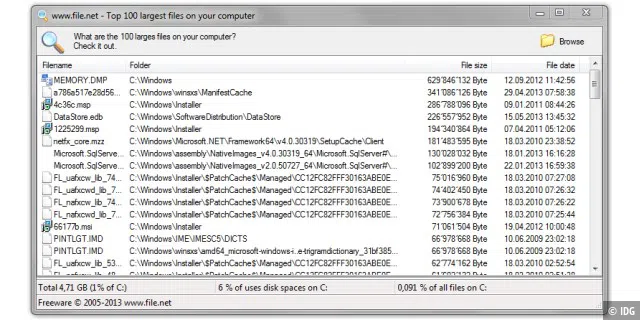
Largest File Finder
Compile a list of the largest files
If you are wondering where all the free space on your new SSD has gone, the freeware Largest File Finder will help you. You don’t need to install the tool, instead you can start searching for the 100 largest files on the entire disc or in the specified folder immediately after double-clicking on its EXE file. At the end, it compiles a list organized by size, which you can use as a guide if you want to create space as easily and efficiently as possible.
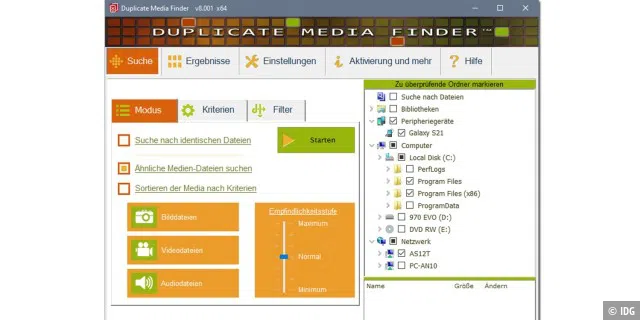
Duplicate Media Finder
Find and delete all duplicate files
Despite its name, Duplicate Media Finder Free not only searches for media files such as videos, audio files, and images, but also for duplicate files in general. It also finds duplicates that have a different name than the original, which is referred to here as the “master file.” The free program is only available in the Microsoft Store. It is a slimmed-down version of a much more comprehensive, paid-for software, which is available for a good $40.
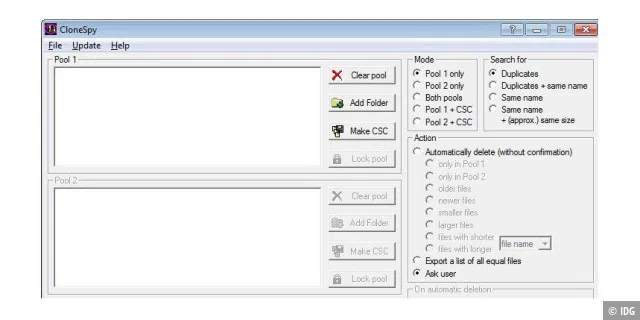
Clonespy
Find duplicate files and delete them individually
An alternative to Duplicate Media Finder is Clonespy. The English-language tool immediately indicates when it encounters a duplicate file and, if desired, marks the older versions or the versions with the longer file or folder name. Clonespy is also able to find files with the same name but different contents or to compare files in two folders — for example on a local and a shared network drive.
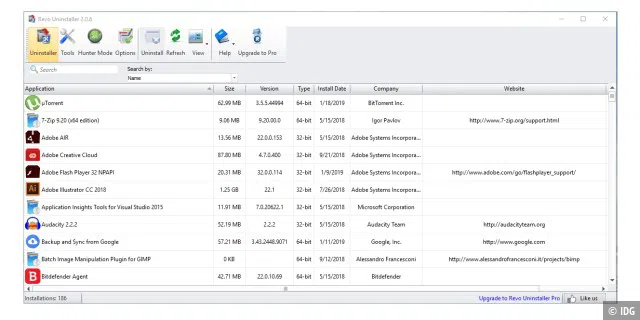
Revo Uninstaller
Remove programs cleanly and without leaving any residue
Revo Uninstaller is the reference in the category of free uninstall programs: The program works very reliably, first starts the uninstall routine of the respective software, and then scans the registry and file systems for any remnants.
The uninstaller also includes tools for cleaning up browsers, Microsoft Office, Windows, the registry, and Autostart. A special feature is the hunting mode, which allows you to remove programs without a functioning uninstaller.
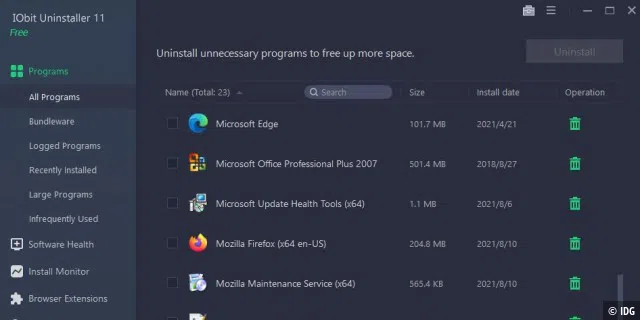
Iobit Uninstaller
Convenient uninstaller with many extras
Iobit’s uninstaller works in exactly the same way as Revo’s uninstaller, but offers a deletion mode for selected programs in one go without prompting. It lists apps from the hardware manufacturer, recently installed programs as well as oversized and rarely used applications, and can also delete browser extensions and Windows apps. You can use an install monitor to log the installation of new software and remove the programs cleanly later.
Privazer
Remove superfluous ballast
The free Privazer program carries out a deep scan for user traces on your drives, USB sticks, network drives, and much more. The first step is to select which storage medium is to be analyzed. Then specify which files you want to search for.
After starting Privazer, a wizard will help you with the configuration with recommendations. Then start the search by clicking on OK. In the search results, you can click on categories such as Internet activities or Cookies to obtain information on the files concerned. To be on the safe side, you should tick the box next to Create a restore point.
If problems occur, the deleted files can then be restored. Finally, click on Clean. The deletion of cookies, residual traces of old files, or temporary files is intended to counteract the slowing down of your computer due to data ballast.
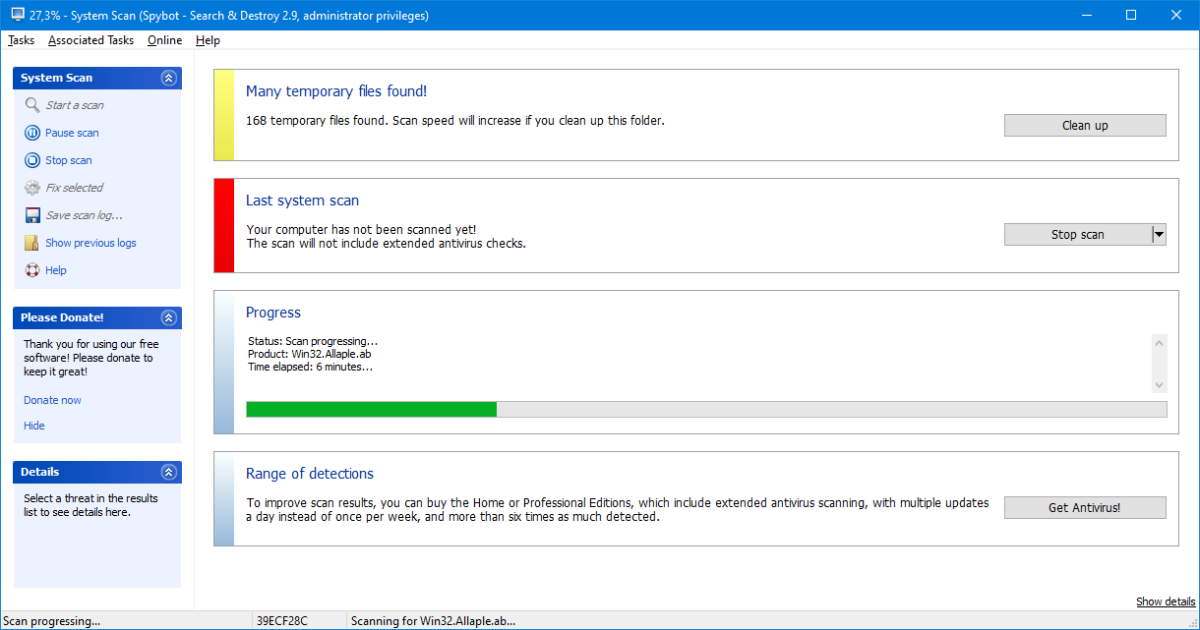
The Spybot – Search & Destroy freeware scans the system for various types of spyware, malware, dialers, keyloggers, Trojans and other threats.
IDG
Spybot
Remove unwanted software
Spybot – Search & Destroy is a long-established product for searching for browser tracking cookies and unwanted software. This does not necessarily have to be malware in the true sense of the word. Sometimes, however, programs install additional software that you do not want to use.
After clicking on Scan system, the tool scans the drives and displays the findings. Check the results, uncheck the boxes next to entries that you do not want to delete, and click on Fix selected.
7-Zip
Archive files and compress them to save space
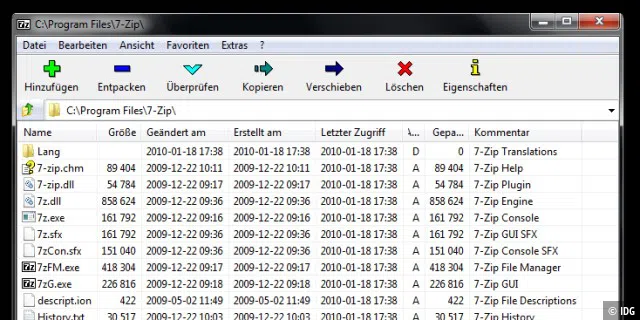
Spring cleaning is a good opportunity to go through your own file archive and move older or rarely used files to an archive. To save space, you should compress the files. If you want to protect confidential documents, the archive can also be encrypted and secured with a password.
All this is done for you by the 7-Zip compression program, which is free open source software. You can also use it to copy or move the archives to new folders.
Faststone Image Viewer
Manage and edit photos
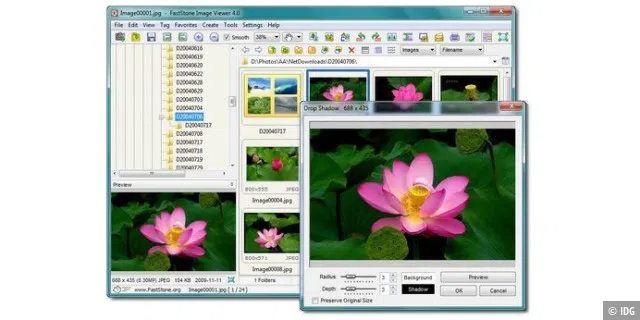
Many users accumulate thousands or even more photos over time, which makes searching for a specific motif much more difficult. Faststone’s Image Viewer shows you all the images in a folder in a preview and offers to convert them into a range of other commonly used formats. The software also has simple editing tools on board, can create a slideshow, and copy and move the image files collectively to other folders.
Digikam
Manage and search for photos professionally
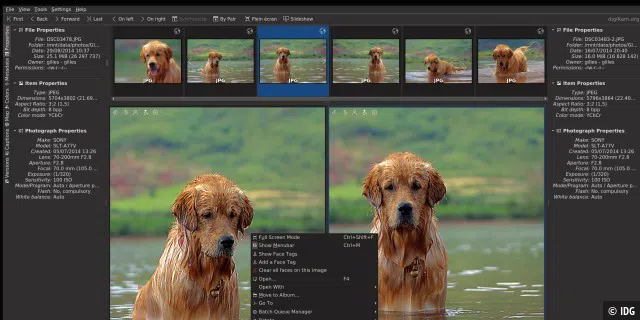
Software for managing large photo collections is usually expensive and therefore only of interest to professional photographers. Digikam is an exception to this rule. The program is open source and free of charge. Digikam is based on a database engine that offers extensive search options according to the date and place the photo was taken as well as other Exif data. This additional information can also be edited. But beware: Digikam is a professional program, which is why it takes time to get to grips with its operation.
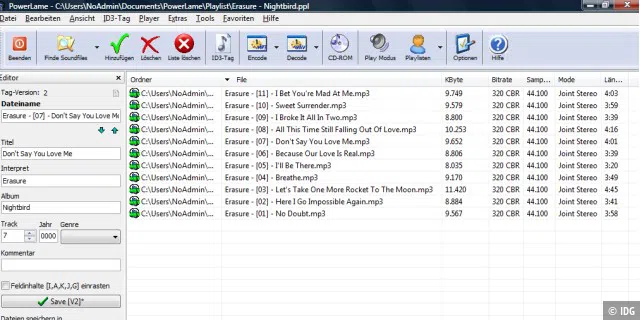
Powerlame
Search and convert MP3 files
As with photos, the problem with MP3 music is that hundreds or even thousands of files gradually accumulate. The desired song is then difficult to find, especially if you don’t have the title or artist on hand. In these cases, Powerlame can help.
The tool also reads large MP3 collections and offers a search mask for ID3 tags. It can also rip CDs, adjust the volume of all MP3s, and convert them into WAV files or search for the corresponding CD covers.
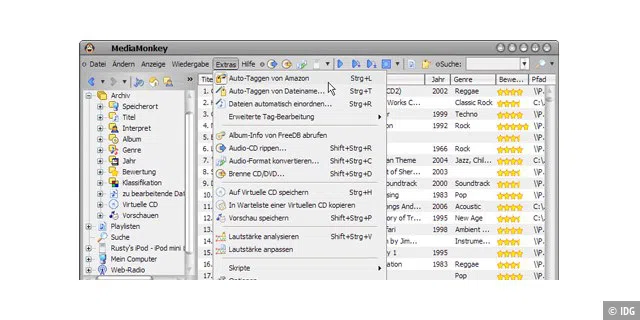
Media Monkey
Add missing data to song files
For the search in the ID3 tags to be successful, the fields must also be filled in. This is usually not the case with self-ripped MP3s in particular. Media Monkey helps you to enter information about a song such as artist, title, album or composer. Among other things, the program automatically searches for the album, downloads the cover, and enters the data in the tag fields. The tool is also an excellent player that creates playlists and offers an equalizer.
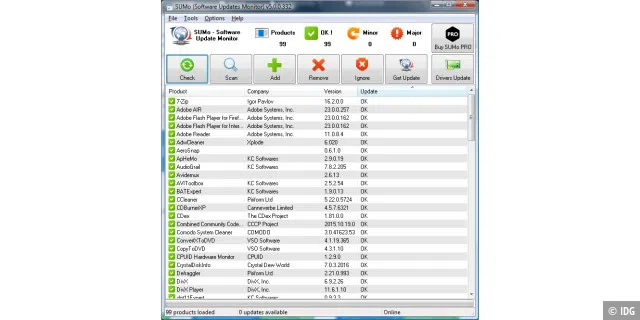
Sumo
Check installed software for updates
You should not only regularly clear your Windows PC of junk data, but also make sure that the installed programs are always up to date. Updates not only eliminate software errors and close security gaps, they often also bring new functions. The freeware Sumo scans the existing applications, lists the outdated programs, and takes you to a download site for the update. The paid Pro version can also take care of the installation for you.
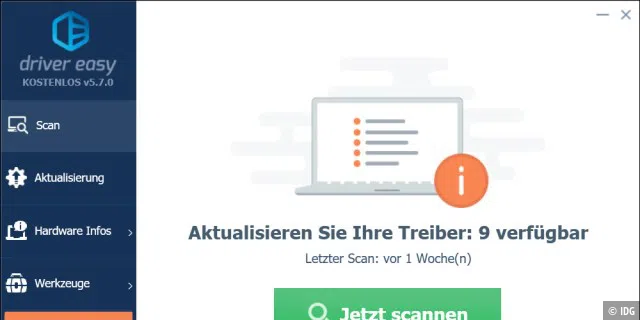
Driver Easy
Update drivers to the latest version
As a rule, Windows provides the appropriate drivers for all hardware components of the PC and also updates them. However, these are often slimmed-down versions without the extended functionality offered by the drivers from the manufacturer’s website.
Driver Easy makes it possible to check the existing driver equipment, point out newer versions, and install them. The free software version only allows manual installation and has a limited download speed.
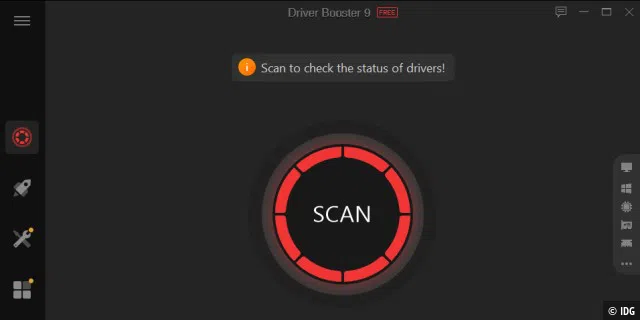
Iobit Driver Booster Free
Detailed driver information
There is also a free version of Iobit’s Driver Booster. This is limited in the display of outdated drivers and refers to other products from this manufacturer in several places. However, the installation of new driver versions works automatically and quickly enough after a mouse click. In comparison with Driver Easy, Driver Booster found more and more up-to-date driver versions for our test PC. The Pro version offers an automatic update and the automatic creation of restore points.
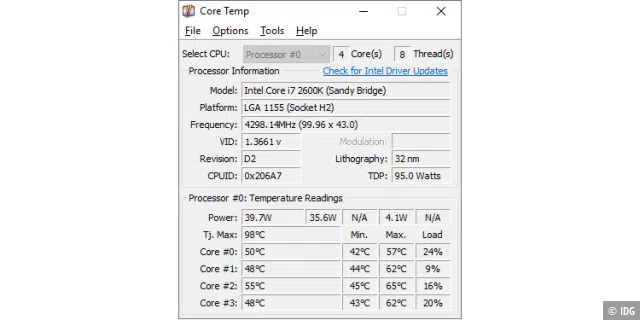
Core Temp
Measure and display CPU temperature
It’s not just in spring that you should take a look at your computer’s hardware. This also includes checking the processor temperature: If it’s too high, this is often a sign that the cooler is dusty, the fan has become loose, or the heatsink is no longer firmly attached to the processor.
Although a protective circuit prevents the CPU from burning out, this lowers the processor clock and slows down the computer. The freeware Core Temp shows you the current temperature of each individual CPU core.
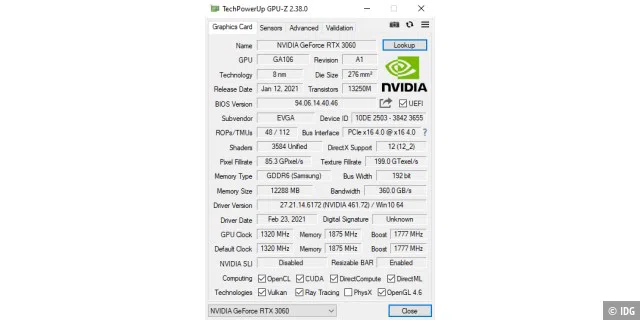
GPU-Z
All information about the graphics card at a glance
A PC’s graphics chip can also overheat and should therefore be checked regularly. The freeware GPU-Z is suitable for this purpose: It determines the model of the graphics card or chip during installation and retrieves the corresponding data from a database on the Internet. A click on Lookup takes you to the corresponding website. In the Sensors tab, you will find the current GPU measurement values, including the clock frequency, temperature, fan speed, memory utilization, and power consumption.
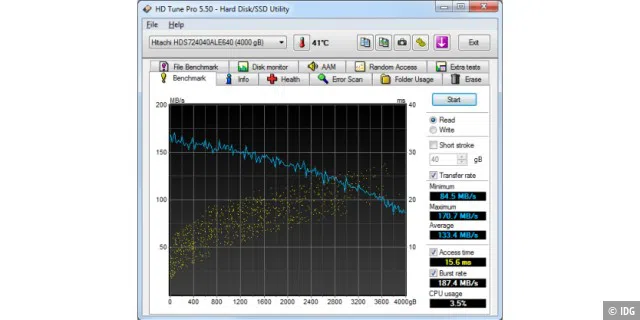
HD Tune
Check the temperature and status of the hard drive
If your computer’s hard drive or SSD fails, important data is often lost. You should therefore keep an eye on its condition and check it regularly. With the HD Tune tool, you can perform a benchmark test, check the sectors for errors, and read out the current temperature.
If the values deteriorate, you can intervene at an early stage, back up your data or transfer it to a new SSD straight away. The paid version HD Tune Pro provides further benchmarks and information.
This article originally appeared on our sister publication PC-WELT and was translated and localized from German.


